Categories
Development London Bus Pal

Why Flutter is better than Android native

There are two inaccuracies in my title: firstly, Flutter is Android native, but we will be talking about developing Android native apps using Java versus Flutter app in Dart; and secondly, one isn’t really better than the other, but in my circumstances, one approach was definitely better than the other.

A brief introduction

The important information about my background which you should know:

  • I published an app in 2013 and I think it has been moderately successful. Not a Candy Crush, but it hasn’t died yet and people are using it daily.
  • I rebuilt this app and it has feature parity with the old one – it does exactly the same thing the old one did (I know, because I’ve had users point out to me where I have forgotten how the “old” app worked). From their point of view, it just seems like I updated the look and feel a bit.
  • Development is a hobby rather than a job (although I work with development teams, but not as a developer). Java and Dart were both self-taught and never used in a professional environment for me. (I learned C++ at uni and have a long history with languages like BASIC, Pascal, C and Visual Basic).

So my qualification to make these statements come from building the same production app in both Java and Dart with limited experience. Let’s dive right into some comparisons:

Java vs Dart

Both languages are very similar and I feel fairly comfortable using both. I was a bit hesitant with learning Dart, but it felt completely natural after being quite used to Java (I’ve dabbled a bit with Python and PHP and I found it much easier to quickly adapt into Dart comparatively).

Doing asynchronous work in Java is a bit more of a hassle compared to Dart. Dart’s syntax makes it very easy (except that in Flutter, you build methods cannot use the asynchronous syntax).

I also got into Dart and Flutter when Dart 2.0 was out, so the language was cleaned up for Flutter, so no annoying “new”‘s everywhere.

And then, Dart either seems to handle nulls a bit better or I have burned myself enough in Java to be handling it better myself. But it feels like Flutter protects you a little bit as you don’t have a mini-explosion every time you forget to handle a null.

The only negative point for Dart, but this more a Flutter thing, is that you end up with lots of brackets everywhere – more than usual. And maybe quite a lot of commas too.

As a language, I prefer Dart as it is a bit more to the point and feels like it is made for what I want to do.

Material design

I spent a good number of weekends implementing material design at the start of 2015. It had only been announced in June the previous year, so it was still relatively new and there wasn’t too much help available in terms of libraries. I remember having to style everything by hand, measuring margins and constantly referencing the material design specs.

Flutter basically gives you material design out of the box. I actually hadn’t realised how “not material design” my app was until I rebuilt it using Flutter. (Of course, I don’t know if you now get some better help in Android native, but it felt really good that the design system I wanted to use was immediately available to me rather than having to sit and figure out margins, padding, shadows, rounding and so on, on my own.)

Getting a material design look in Flutter was effortless compared to doing the same thing in Java.

XML vs code

When you work with Java, a lot of layouts, strings and random values will reside in XML instead of code. This should make scaling with large teams easier as there is a separation of concerns and a designer can pick up the XML files and edit them without having to know code. As nice as this is, I don’t like it for a smaller project. And then, you end up having to reference the XML in code any way, and you always wonder why you can’t just do it all in code (maybe you can?). It felt like things got messy having to work in XML and then use LayoutInflater to build the things I just build in XML to start with.

On the flip-side, I miss one thing: Strings.xml. This allows for easy translation and just having everything nicely in one place. I have seen a way to do it in Flutter, but it didn’t immediately make sense to me. I never actually translated my app, so it’s probably over-engineered, but equally don’t feel too happy with the strings just sitting all over the place. (I should probably at least just create a static class to put all my strings in…but that’s for another day).

Because I definitely prefer being able to have complete control over my layouts, I prefer the Flutter approach where it is all in code. The XML approach would have been more useful for WYSIWYG editors, but they never worked too well for me and I didn’t feel completely in control. And the fact that it would try and display even the smallest layout in the editor. It was just odd.

Hot reload

The lack of WYSIWYG layout editor in Flutter is made up for by having hot reload. It can do some strange things at times (or in my app if I change things which are done right at start-up, hot reload doesn’t work), but it is great for making layout changes and being able to see it immediately. This is not available when using Java and slows down the process a bit.

Fragments vs widgets

I’m calling out fragments here, but it really should be, “Widgets vs the Android kitchen sink”. Everything in Flutter is a widget – this makes it very predictable on how it will work and easy to move around and plug in somewhere else. It took me minutes to take my existing layout for phones and adapt it for tablets where I wanted side-by-side views of two different screens.

Adapting my app for tablets in Java was a complete nightmare. Again, things might have changed, but I had to use fragments. I had two fragments and it just felt awkward trying to deal with it differently between tablets and mobiles. Because everything is a widget in Flutter – this sort of thing is quite straight-forward to achieve.
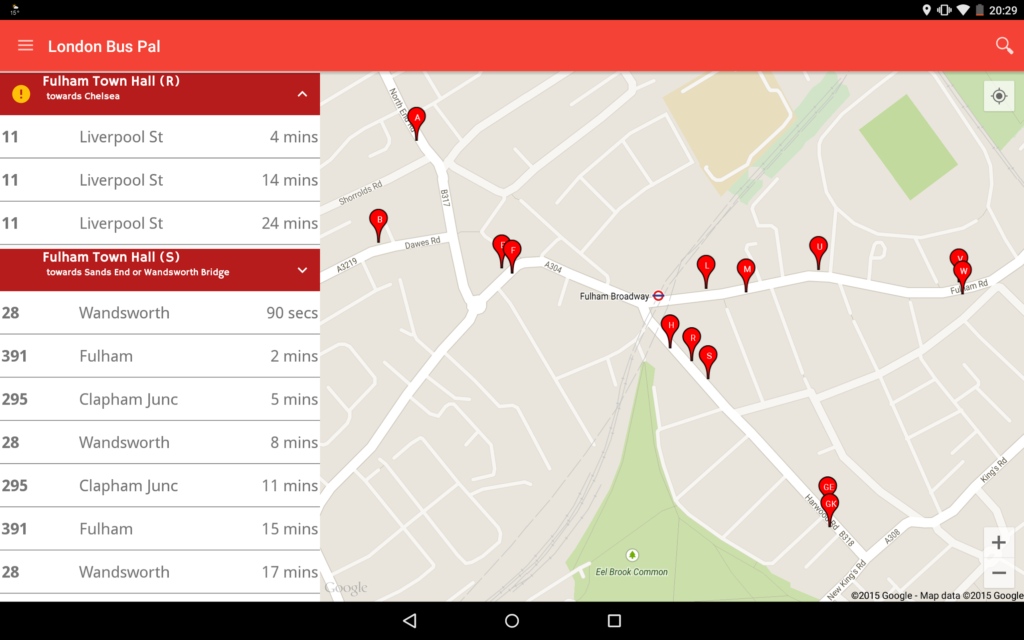
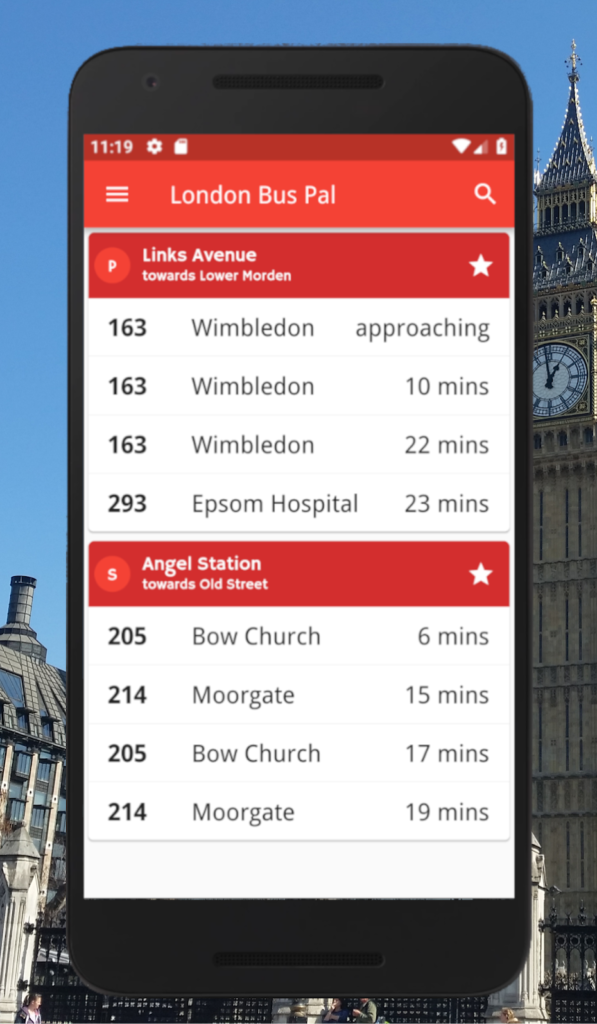
This is the layout I tried to achieve on tablets with content on the left and a map on the right

It’s worth pointing out, that even after all of that work with fragments, the app stopped working on tablets at some point and I just never had the courage to want to try and fix it again. Until Flutter came along…

Flavours

I have three different flavours in both my set ups. The Flutter one would not have been as straight-forward to set up since I had to go and muck around in the Android code – but since I have done it before, it was pretty much copy and paste. If I was new to this, I can imagine it would have been pretty difficult to figure out as you have to change files you don’t normally deal with.

One of my flavours has a different applicationId which I can use in Flutter code to distinguish, but two of them don’t and I cannot easily and without some workarounds detect in code which flavour is which.

I would prefer it if there was an easier way to deal with flavours in Flutter, but it barely handles it at the moment.

Dependencies

For both Java and Dart, dependency management is quite straight-forward. Dart feels a little bit more light-weight and straight-forward – I have many more dependencies in my Java app for Android support libraries which I didn’t need in Dart (due to Flutter).

Due to not having to worry about the support libraries I prefer Flutter for dependency management, but I’m sure this might be why the APK’s are so big.

APK sizes

This was almost a deal breaker for me, and even though the production APK’s are quite a bit smaller than the debug ones, this is Flutter’s worst point for me by far.

The Java APK is 4.07MB and the Flutter one is 10.03MB.

Due to the large initial size of the Flutter APK (I started somewhere around 18MB), I had to be aggressive in terms of making images as small as possible, reducing the size of my static data database and be very careful with dependencies. Both APK’s are Proguarded/Minified. My Flutter APK is only that small due to a dedicated effort to try and get it as small as possible. If I put the same effort into the Java one, I’m sure I would get it to be a bit smaller.

Android Studio vs VS Code

I moved from Eclipse to Android Studio and liked it in the beginning, but it was quite heavy on the processing side. I’ve killed a laptop battery due to it and I’m fairly sure the heat Android Studio has generated in the past might have fried a few laptop components too. I now use a desktop, but Android Studio is still quite heavy-weight and it just feels too clunky.

Even though I use Android Studio from time to time due to wanting to use the layout inspector as an example, I prefer spending my time in VS code.

Maturity

We have to touch on maturity here. Because Java Android has been around for years, you have access to tons of libraries and many resources. Getting stuck shouldn’t happen for long and you’ll be helped quite quickly. All the libraries have had years to stabilise and shouldn’t give you problems (well, you’d think so at least).

On the other hand, Flutter is still fairly new. I’ve had specific issues with libraries crashing my app because despite claiming to be version 1.1+, version 1 just meant it was their first publication. I’ve also had issues with libraries being incomplete. It’s worth pointing out that in both cases, I found suitable solid alternatives, so I haven’t been left with nothing.

This is probably set to get worse for now as many libraries are still experimental or beta. As these libraries are upgraded, I’m probably going to have to rewrite large chunks of code. (Although, my Java code is probably in that situation now as I haven’t upgraded libraries for about 6 months).

Wearables

Neither app had a wearable version, but it was an option for me when I was working in Java. Flutter doesn’t support this yet, so if I had any plans to also have a wearable version, it isn’t currently possible.

I’ll mention it here only because it is also in the category of I don’t have it, but had the option and lost it – widgets. I believe that Flutter doesn’t yet support home screen widgets on Android, but this I cannot confirm.

Flutter’s best feature for me

So I’ve saved the best for last – Flutter gives me something I’ve wanted since 2013, but due to many issues, like time constraints, willingness and ability to learn, having to work on a Mac, I just never could build an iOS app. Flutter gave me this for free. Of course I had to set up a Mac in order to test it, but it just worked – pretty much out of the box with no code changes whatsoever (working is of course different to being usable – I’ve done a post on Flutter on iOS for Android developers about my lessons I’ve learned).

I’ve broken into a whole new market due to Flutter, so this is for me, the main reason that Flutter is better than using Java Android.

Summary

This is all my opinion based on my own use case, but hopefully you can find some useful bits in here if you are deciding whether to use Java for Android for Dart for Flutter. The checkboxes simply point out which is better at supporting the feature than the other – in most cases features are supported in both.

FeatureAndroidDart & Flutter
Language – both languages are very similar, but Dart makes asynchronous development a bit easier and handles nulls betterJavaDart
Material design – I had to hand-craft material design when I worked in Java, it came out of the box with Flutter

XML strings – having Strings all in one place and an easy way to translate them was useful in Java. It’s possible in Dart and Flutter, but not without some hand-crafting.

XML layouts – I disliked having to manage my layouts separately in Java and prefer the control I get in Flutter.

Hot reload – only available in Flutter and turns your emulator into an almost WYSIWYG layout editor

Widgets – everything being a widget in Flutter simplifies things a lot and makes it clear and predictable how they will interact with other widgets

Flavours – this isn’t completely baked in, but supported by Flutter. I would prefer the ability to know programatticaly which flavour is being used and not have to fiddle around the Android source to set it up.

Dependency management – pubspec.yaml feels more lightweight than a build.gradle and I don’t have to worry about all the support libraries just to build an app

APK size – based on what you get for it, I feel that the Flutter APK is probably still too bloated4.07MB10.03MB
Android Studio and VS code. I prefer VS code as it is more light-weight and doesn’t try and cook my processor, although I switch to Android Studio from time-to-time for things like the layout inspector.

Maturity – it would be unfair to say that Flutter is incomplete, because it is possible to build a production-ready app with it, but some things will be a bit harder to do due to it still being relatively new.

Wearables – not supported in Flutter yet, but I expect it will happen if wearables are still popular in a couple of year’s time.

Ability to build for iOS – this is the winning point for me about Flutter. I no longer have to fear that I’ll have to learn Swift or Objective-C. It makes me sleep better at night.

Categories
Development London Bus Pal

Flutter on iOS for Android developers

I’m previously an Android developer who got started with Flutter and rewrote my Android app in Flutter to release it on iOS. During this process, I learnt a few things about implementing material design in iOS and generally things you might want to think about as an Android developer when you also work on iOS. (I flip-flopped between using Flutter or material design in the title as this post is about a bit of both).

As an Android user and a bit of a purist, I get pretty annoyed when I use an app and it looks like an iOS app. I want developers to respect the Android platform. In comes material design and this changes the thinking, material design is supposedly cross-platform and apparently should be fine for iOS too. Ok, so Google said that is the case and I believed them.

I took my Android app and developed it for Android and at the last minute, picked up the MacBook and built an iOS app from it. It surprisingly just worked! I put in no special code for iOS (the only exception for platform specific code was a check I had to do in order to support upgrading from my native Android app to my Flutter app (which I know is still native!)).

Never look back

When I ran the app on the Apple simulator, I realised that there wasn’t really an easy way to navigate back in the app. Since I used the Bloc pattern and I had a burger menu, I rely on the Android or hardware back button in order to go back in my app. I wrongly assumed (and I’ve had an iPhone before, so I realise how naive this was) that since Apple users don’t have back buttons, they think differently about navigation and would probably just find a different way of navigating to the thing they saw two screens ago.

I showed my app to a colleague on his iPhone and his very first reaction was – “how do I go back” – he was looking for a way to go back in the top left hand corner of the screen.

Luckily, since I was already handling the back navigation using the Bloc pattern, I could just provide a button on the page that would do the same thing and help the user to navigate back.

Show context

When I investigated “back navigation” in iOS, a pattern I noticed is that you generally want to see context of what you are navigating back to, rather than just “back”. So I also had to start keeping track of that too.

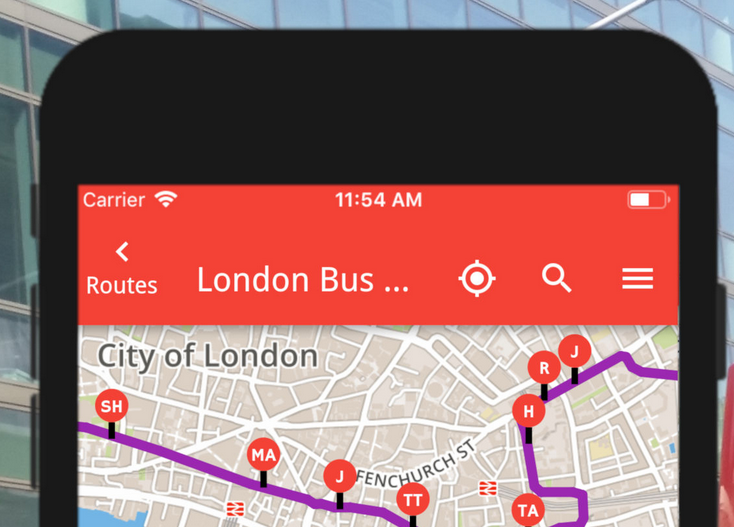
The back navigation which also shows the name of the previous page (Routes).

In the screenshot I did, I realised that my app bar is looking a bit crammed, but the general idea is there. I had to add in back navigation, since there would be no other way to achieve this.

The other thing I had to do for Apple devices, is to shift the burger menu to the right, since the left is now taken up with the back navigation. I have seen examples where the back navigation and burger menu would be below each other, but I chose to just have it on the right hand side instead for Apple devices.

Back ≠ exit

On Android devices, once nothing is left on the back stack, you just exit the app. This is not a pattern followed on Apple and you should not just quit the app. At the point that nothing is left on the back stack, I just remove the navigation button.

No transparency with Apple

A bit of an issue I had was with my launcher icons and also with my screenshots for the app stores. You are not allowed any transparency in these images. In hindsight, it feels like good practice, but it’s annoying when you have made a bunch of icons and a bunch of screenshots and have to redo them.

Build is different

It is worth mentioning here. Building an app for iOS is a bit different and there is a bit of a process. I had to get my hands on a MacBook and had to do a few weird things with certificates (I really have no idea what exactly I did!). I follow a fairly mechanical process in getting a build done and Xcode also automatically submits your app to the store. In there the process is also a bit different (and slightly slow).

Summary

It was a whole lot easier getting an iOS app out than I ever thought it would be. Apart from a few minor styling changes and a change in the way my users navigate back in the app, the app works the same on both platforms. I was really surprised at how easy it was – especially since I told my users about 6 months ago that I’m unlikely to ever give them an iOS app.


Categories
London Bus Pal

Tips I wish I had when I started with Android apps

I first published my app in September 2013. I am still iterating on the app, with 4.0.9 being my latest published version and 4.1.0 under development. With the benefit of time, things have become clearer and there are some things I wish I knew upfront (these are just a collection of thoughts, which I think an Android publisher should think about). (I only first published to the Apple App Store in December 2018, so have no real experience yet – this post is all about Android).

This is just a random list of thoughts on my experiences over the years – things I have done or some times things I wish I had done.

Old versions

In 2019, I’m still seeing app versions being used out in production which became obsolete in 2015 (2.1.1 was used on 6 January 2019 when 2.1.2 was published on 13 January 2015). It is really difficult to control app versions once they are published. Either have a strategy to force users to upgrade, or make sure that your app will stand the test of time. With the latter, I mean, don’t put in layers in your app which will break in 5 years time when you no longer maintain that service (for example, you deprecate a Firebase datastore or move to a different cloud provider). Version 1.0.0 of my app still works exactly the same as it did on the day I built it. And whilst that is pretty good, consider whether you would want to say that 5 years later when the whole world has moved on.

It is simply impossible to easily force upgrades, unless you force it in your app. While many upgrade fairly quickly, many don’t. It’s been over two weeks since I’ve launched version 4 of my app – yesterday’s stats show that at least 27.5% of my users still haven’t upgraded.

This might seem insignificant, but it becomes a big problem when you discover a breaking bug for example. Think carefully whenever you publish a new version of your app – it will be out there forever. I have done some “panic publishing” where it is just one fix on top of another to the point where the app is very stable. But, while the panic was underway, people installed the “bad versions” and never upgraded again.

Multiple app stores

This is probably easier now than it was in 2014. Back then, there were some viable alternatives to the Google Play store (to the point actually where a significant amount of my initial traffic was actually from a different app store). At some point, my app was on 6 or 7 different app stores. This might be slightly contributing to the number of older version of my app still circulating – over the years, app stores have changed named, sold on their inventories, closed down and I’ve found my app on app stores where I’m fairly sure I never published. Think very, very carefully if you are considering publishing to alternative app stores – is it really worth the effort? (At the time I thought it was, but it was a complete waste of time – if I were to do it again today, my Android app would only go on one, maybe two app stores).

Monetisation strategy

This is another one which has changed over the years. When I got started, most publishers who couldn’t sell a subscription service would monetise by having a free app and a “pro” version of the app. Thankfully, the problems introduced by having two app versions were not compounded by doing this on multiple app stores. I only followed the two app approach on the Google Play store.

I have had many people download the free version and I have good number of daily users. For my “pro” version (which is just a paid for version with the ads removed), the traffic is neglible. To the point where it would make absolutely no difference to my bottom line if I unpublished that app tomorrow. The problem with the “pro” version I have, is that people paid for the app out of loyalty, so I feel obligated to return that loyalty.

Having a free and paid for version also raises the question – do I launch new features to my paid customers first or to my free users? Usually, I end up using my free users as the guinea pigs to basically prove the app is stable first before rolling it out to my paying users, but is that really what they paid for?

Lately, I’ve been thinking more about paid for versions and how to monetise them better. I have come to the conclusion that in the app market, apps which are constantly being updated and improved, should not be sold, but subscribed to. A user who paid 0.79p in 2015 (to whom I am very thankful) are getting a really good deal 5 years later as they have a much better app and have paid very little for it. As a publisher, it feels slightly skewed that I could compete on price with another app, but it’s all about what we are delivering at that point with no promise of what is in the future. I want to look at moving to a subscription model – you sign up and pay for what you get at that point and if you are happy with what you get in the future, you can continue paying, otherwise you stop.

Crash reporting

Things really changed for me when I put in some crash reporting in my app. You can test all you want, but there are always the really strange devices out there or strange combinations of hardware and software. My app only started picking up when I put some crash reporting in place and I could see if users were experiencing issues.

User experience

There are many apps out there which simply seem like containers for ads and some incidental content. This is not sustainable in any way shape or form. I have seen these apps come and go – they might have made more income in the week or two they were on the app store than I did, but 5 years later, my app is still around and getting great reviews. Don’t fall into the trap. Design an app with really good user experience in mind and then add in the monetisation you want, but don’t let it distract from good user experience. You might not get the high RPM’s from having inobtrusive ads, but you will get loads more traffic if you have a good app, which will pay off in the long run.

Your users do not download your app for the ads – it is not a feature for them, don’t let your app just become a billboard.

Keep things up to date

I went through times where I neglected my app for long periods of time. Making even the smallest change would be such a headache because I would have to upgrade all my libraries and then everything would break. If I just kept up to date and upgraded as I went, it would not be so daunting. When GDPR came around, I had to spend a significant amount of time trying to upgrade libraries and see what would break where. I am going to try to at least do that this year!

Listen to your users

Read every single word your users write to you. Users who take the time to write feedback, whether good or bad are helping you out. By listening to their feedback, you could be making the experience better for others in future. One user’s feedback acted on could mean 500 fewer uninstalls next month. Don’t ignore your users – you created the app for them after all.


Categories
London Bus Pal

Version history

As I’ve just published a fourth major revision of my app, I thought I would relive the history of the app just to see how far it’s come:

Version 1 – the prototype

This was my first attempt at ever making an Android application. I used Google Web Toolkit which I then rendered in a web view in the application (basically GWT compiles into very optimised Javascript). Not being a fully native app wasn’t really an issue since I managed to successfully do callbacks between the app and the web view, so the app would handle things like a user pressing the back button or doing an in-app search without any hassle. Correctly handling the user pressing the back button is something which stands out for me.

This version was first published on 6 September 2013, version 1.0.1 (incorrectly numbered 1.01) followed 2 hours later and version 1.0.2 followed 2 days later.

Version 1.1.7 – the “Metropolitcan line” purple stands out.

Opening version 1 with no nearby stops (as I no longer live in London) just shows a blank screen. I see no options and I clearly deployed a version with no ads enabled!

Version 1.1.7 was the final instalment of version 1 and went live on 28 December 2013. When I now open the app, I see an error (as I am not anywhere near London), but it is quite generic and could really be anything.

Improvements I can see is a loading indicator, the search bar looks much better and a new map icon which appeared. The map views have always annoyed me as I haven’t given it too much attention. Something else which is quite obvious is that the lines are not high enough for a touch device.

Version 2 – going native

Version 2.1.3

The first release of version 2 was in October 2014. I rewrote the entire app to get rid of Google Web Toolkit and all the callbacks between basically a front-end and back-end.

Opening version 2.0.0, it looks very much like a minor change from version 1.1.7 (except I know it was a substantial change!). The one thing which is obvious is that the listview tiles have become even tighter.

Fast forwarding to version 2.1.3, the list view is still very “tight”. The changes I can see from version 2.0.0 are: I can now search for specific bus stops by name and we now have some settings. In the settings I can see that by this time I changed my implementation to allow more granular view of nearby buses (showing in 15 seconds intervals rather than seeing “due” for 90 seconds, which can feel like forever if you are waiting for a bus!).

Version 3 – material design

Version 3.2.11 – The final version of the third rewrite

Version 3.0.0 was released only a week after 2.1.3, but I had been working on it for quite some time. This version was all about material design and it was fairly cutting edge, as material design was only announced in June of the previous year. The design hasn’t changed too much since this release – apart from a styling change for dialogs. The main design has remained fairly similar since. In the back, there were a fairly large amount of moving parts, but most of this would have been invisible to users.

The next notable update was in May 2018 with GDPR coming around. With 3 days to spare, I put out the GDPR release on 22 May. This caused so many headaches that I had to try again several times to the point where I actually started over and finally released the last version on 7 June 2018.

Version 4 – Flutter and iOS

Version 4.0.0 – Not made public for Android

At work, a colleague told me about Flutter and I decided to investigate. Having looked at it, it seemed to be a really easy implementation of material design and there was the added bonus of being able to also build apps for iOS. I’ve had some requests to also make my app for iOS, but I didn’t want to end up having to maintain two code bases, the only way I would do that is if I ended up with a single code bases. I had considered many times if I should go back to my version 1 design to facilitate this. Early in November, I installed Flutter. It was a slow start, but I gained speed and confidence really quickly that I was using the right technology.

On 16 December, I published version 4.0.0 of London Bus Pal. Not as an Android app, but as an Apple app. I wanted to try the Apple deployment process and see if I missed anything major. And I was still missing map views, so I decided to soft launch on Apple and Android would follow once I had map views in place. Finally on 26 December, I launched version 4.0.3 on Android. Being another rewrite, it is quite nerve wracking, because things which were previously fixed or just stable, might not work. I have seen a few small issues, but not being used to the new error reporting software, I don’t always know if my users can see all of the errors.

What’s next?

Well, for now I’m going to focus on stabilising version 4 of London Bus Pal. The way it has been designed now, means that it should be quite easy to add new features. But I might just leave it alone, because I have a steady following of users.

Categories
London Bus Pal

Map views are here!!

I was hoping to get this out there quicker, but rather late then never!

This week I added some map views of all the data to London Bus Pal.  There are four “distinct” views of data in the application, but only three maps are interesting (seeing a single bus stop isn’t the most interesting view!).

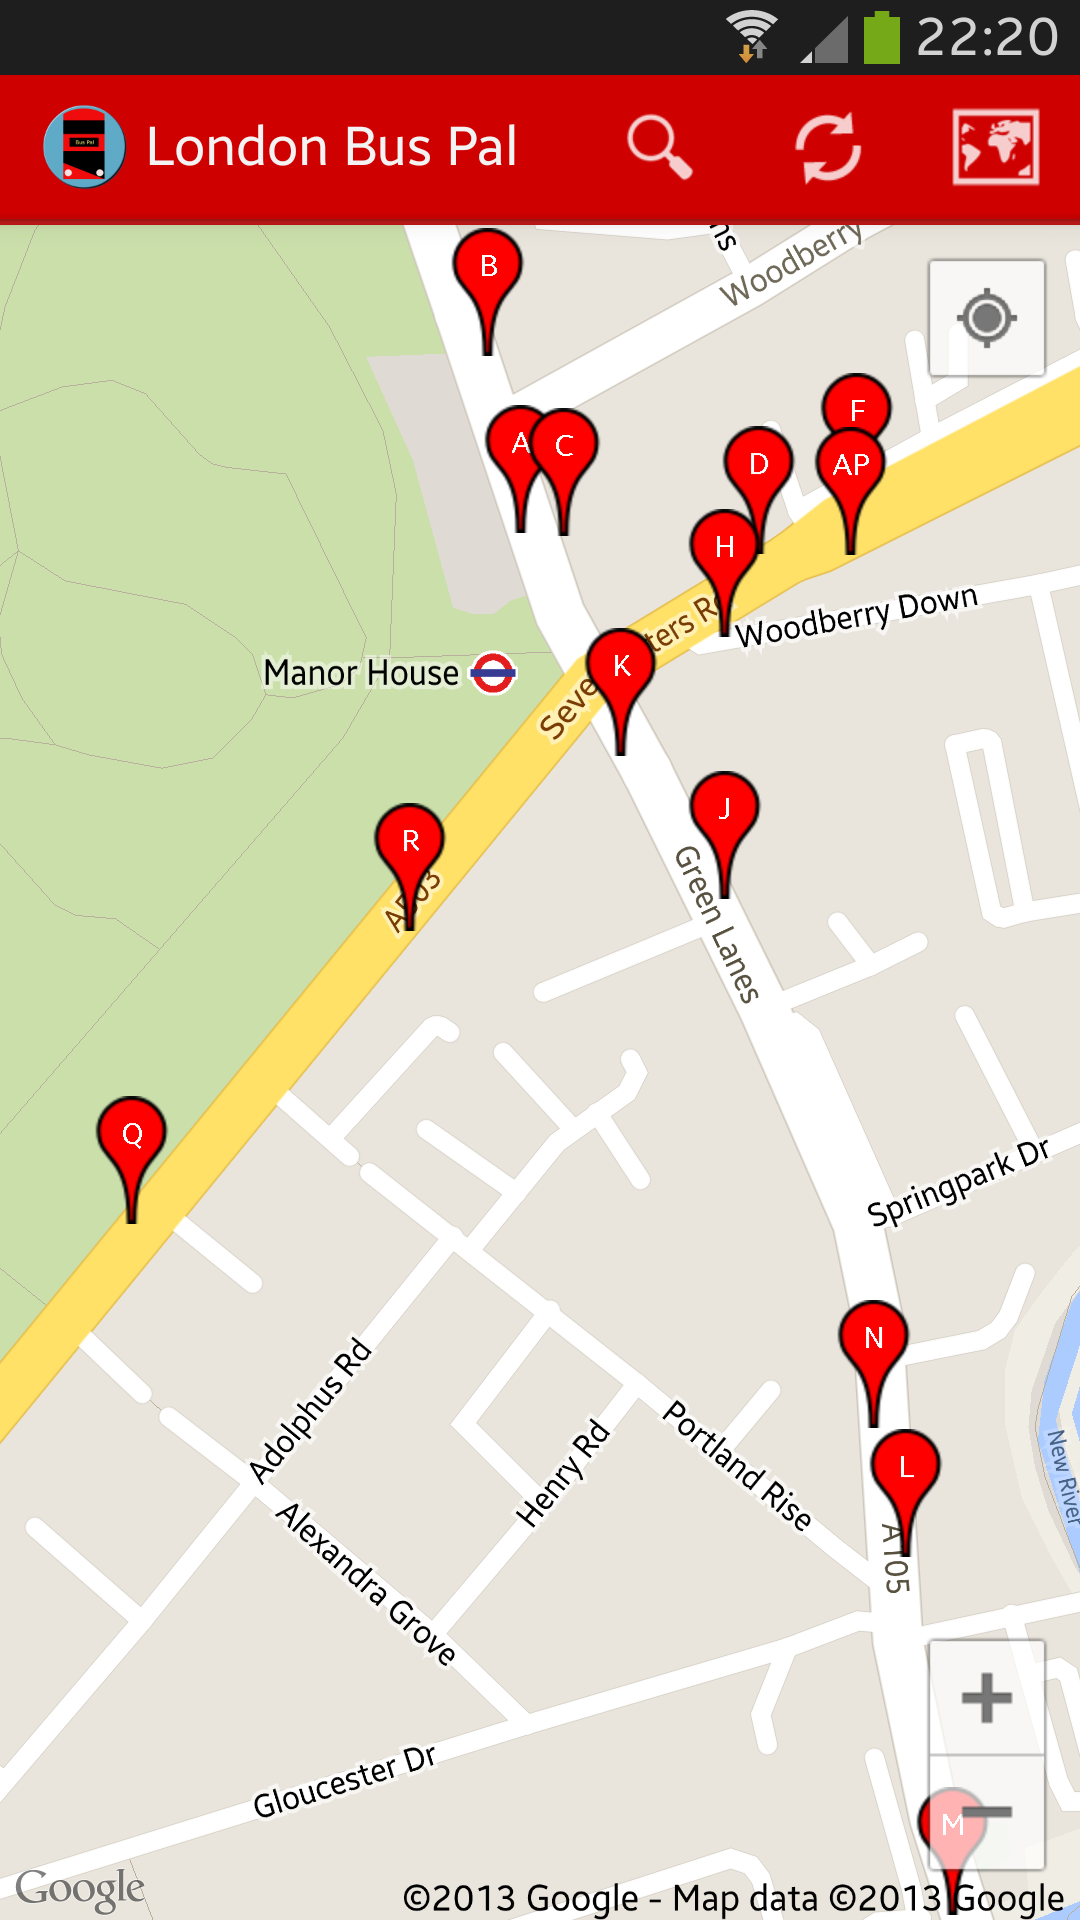
Multi-stop view

If you switch to the map view from a list with multiple bus stops on, you will get a view similar to this.  It shows you markers of all the stops near you with their “letter” indicators on, it there are any.  This is a really useful view to see any bus stops in the area or near somewhere else you might be going (try searching by post code).  Tapping any of the markers will give you the name of the stops and where it goes – if you tap on the information box that appears, you will then be taken to the screen to see the estimated arrival times for all buses serving that stop.

Screenshot_2013-09-21-22-20-51

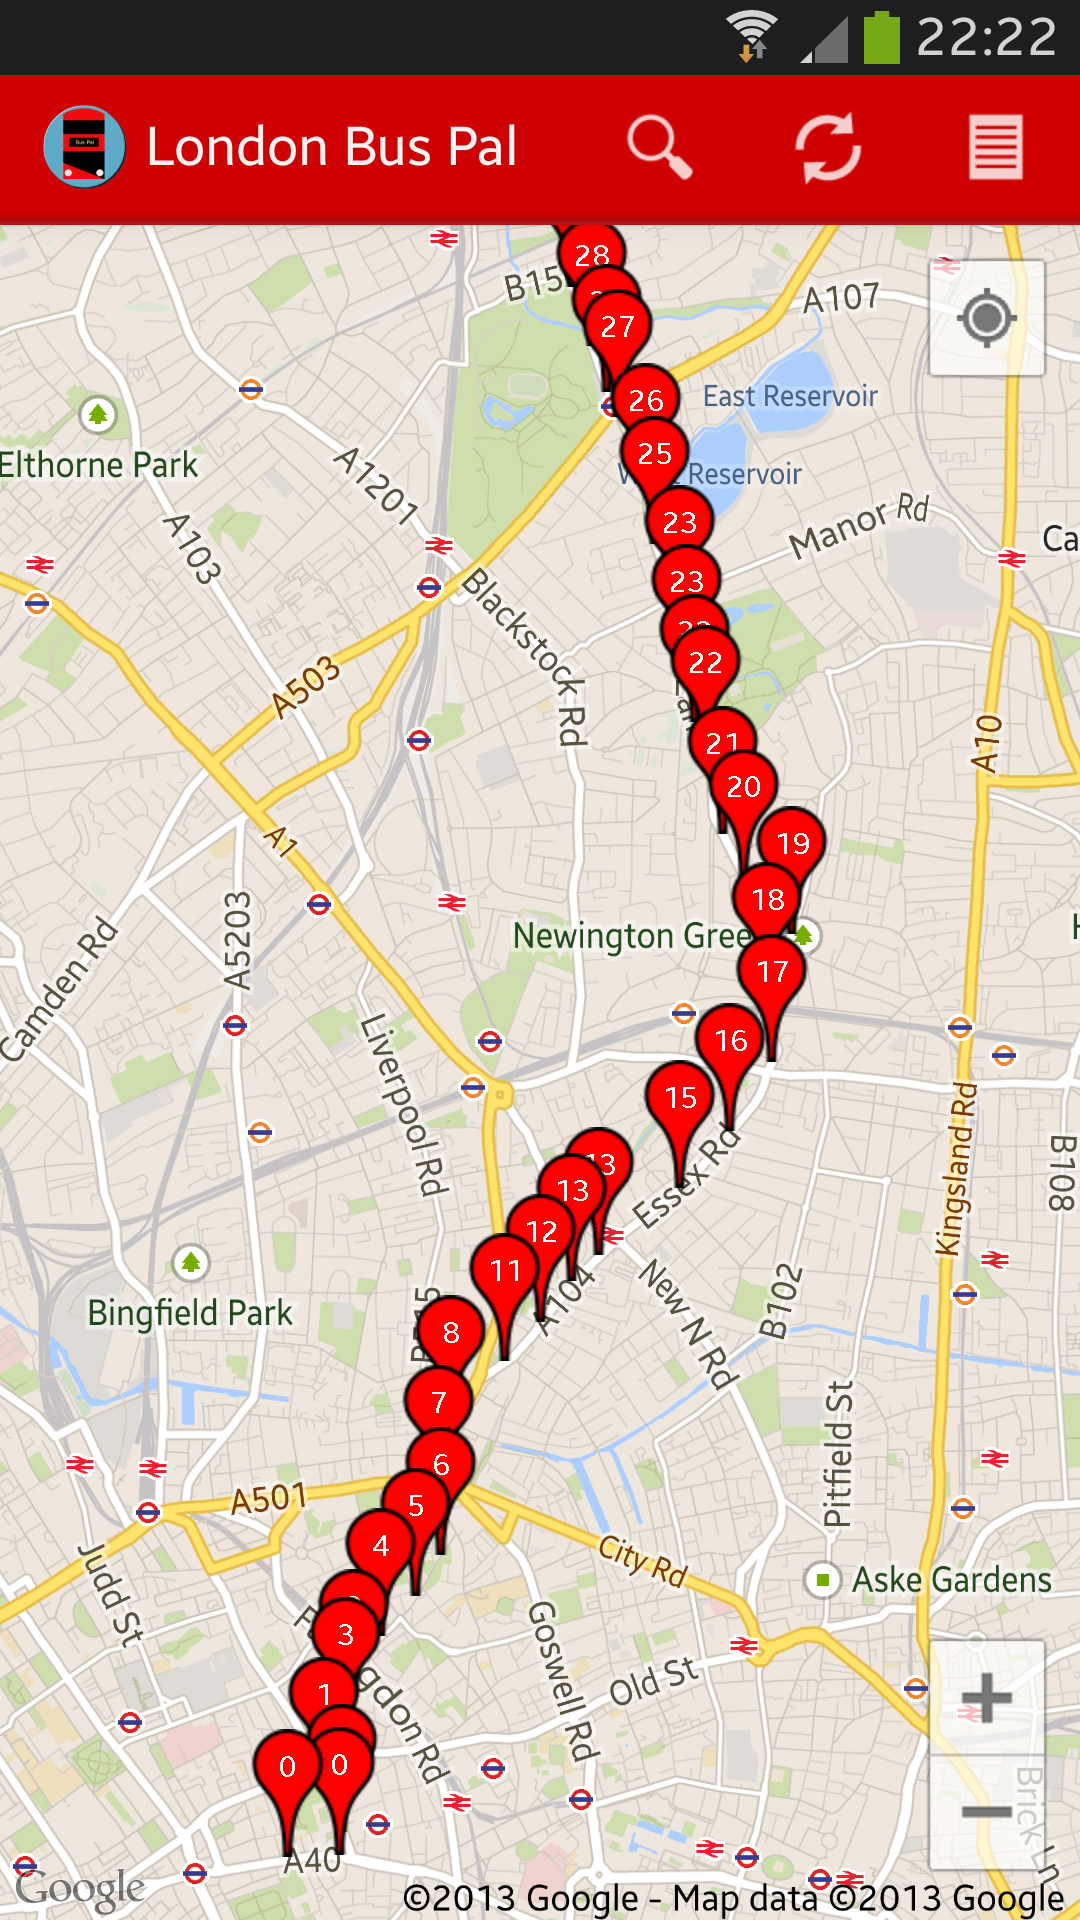
Bus prediction view

The next view that is possible is one showing you a list of all stops for any specific bus over the next 30 minutes and the number on the marker indicates how many minutes the bus is expected to take to get there.

Screenshot_2013-09-21-22-22-27

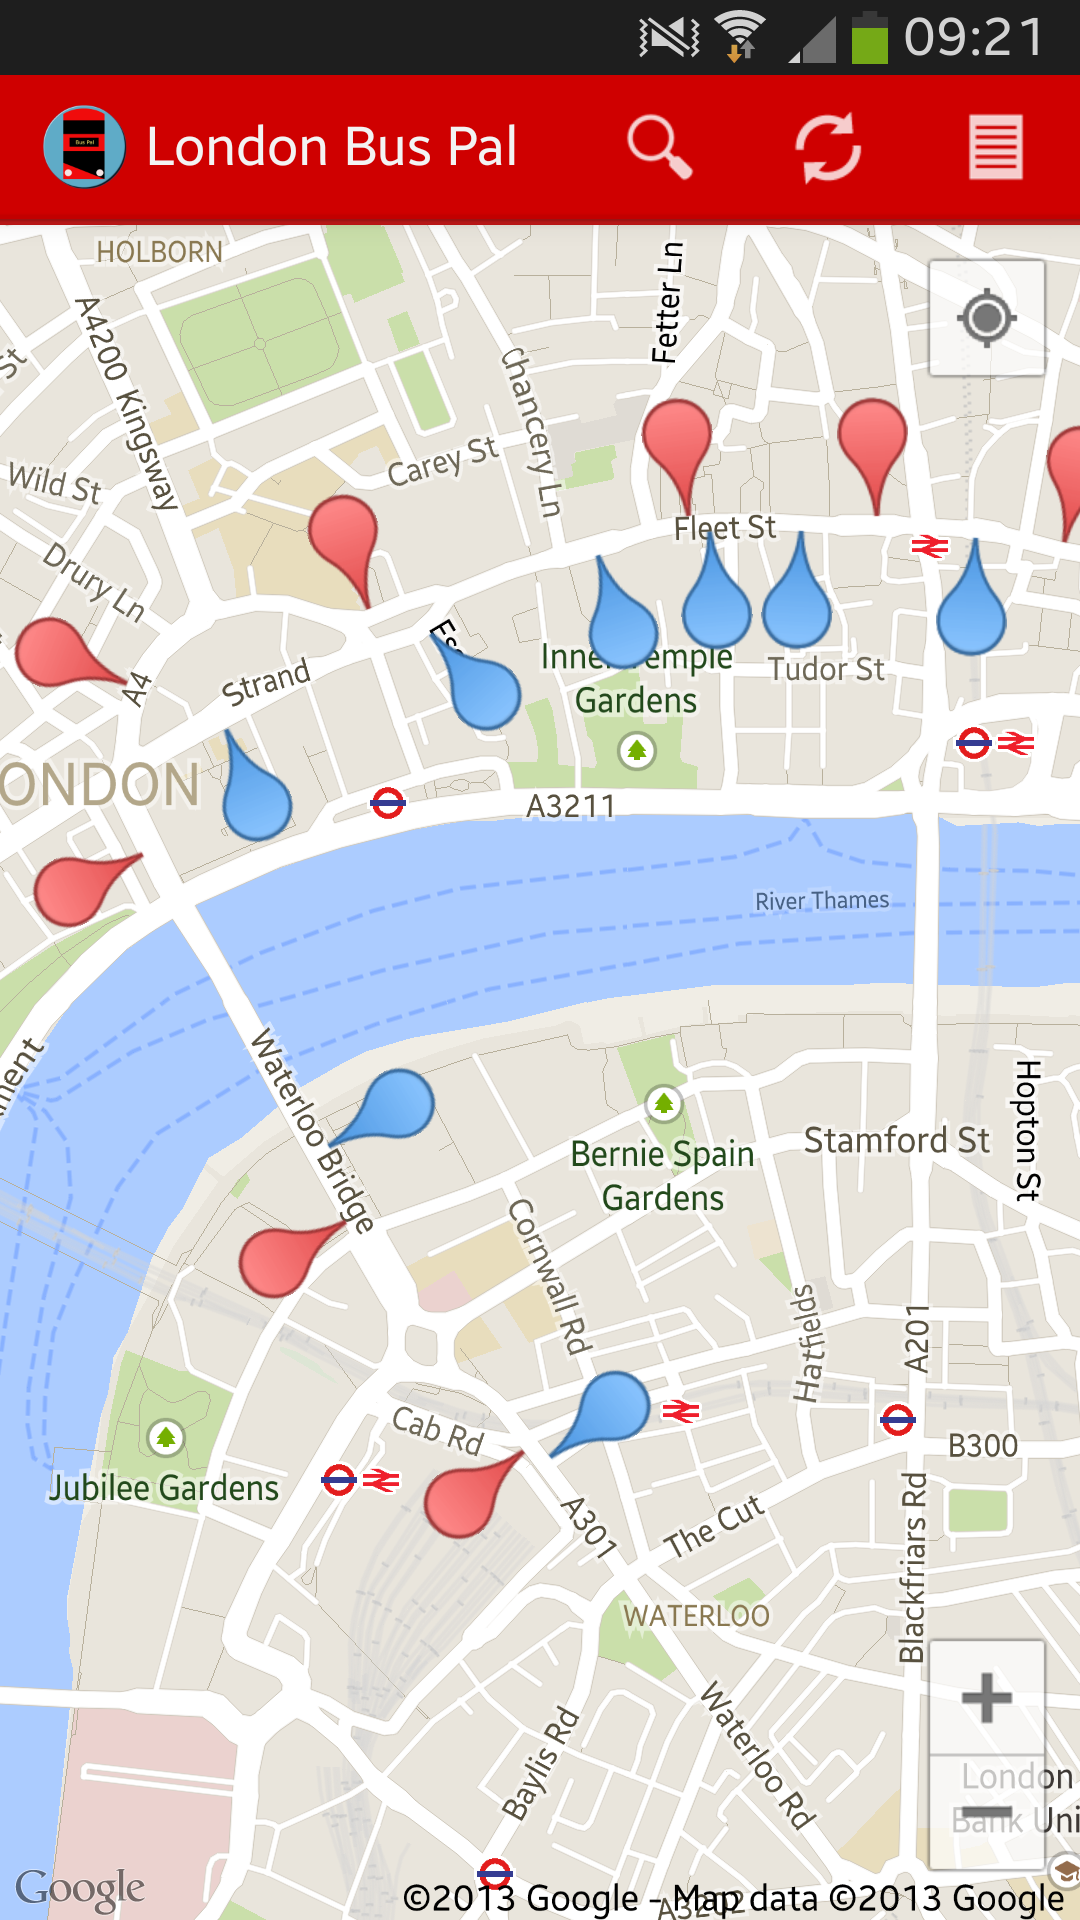
Bus route view

The last view I want to show you, is the bus route view.  This is a calculated route based on all buses for that route over the next 30 minutes showing their stops.  Red markers indicate one direction and blue markers indicate another direction.  The pins are also arranged so that you can get an idea of which way the bus is going (I will add some arrows soon!)

Screenshot_2013-09-22-09-21-17

If you don’t have London Bus Pal yet, you can download it from the Google Play Store: https://play.google.com/store/apps/details?id=com.mulder.buspal


Categories
London Bus Pal

Racing the bus by tube!

I travel between Angel and Waterloo on most days. Most of the time, I take the 341 bus, because it always seems quicker than the tube and it’s also a whole lot less fuss. The strange thing is though, when I’m running late, I choose to take the tube, because even though the bus feels quicker, my logic tells me that the tube must be quicker. So I put it to the test this morning.

First, some ground-rules: I always walk as fast as I can without running or being rude (no pushing people out the way). I walk up any moving escalator, and I know my route very well, I take the shortest route to each platform and take the first available train.

  • 09:21: Arrive at Waterloo station. Check the bus will be at stop F in 1 minute – if I want to make it to the bus, I need to get there now, but today, I’m racing the bus instead of taking it.
  • 09:24: I get down to the Waterloo & City line platform with a train ready and waiting for me.
  • 09:29: Arrive at Bank station. At the point I begin to even wonder why I bothered – it all seems to be going quite quick. Unfortunately though, because I jumped straight on the train at Waterloo, I am right at the back of it, so have to fight my way through people to get to the Northern Line.
  • 09:33: I get to the Northern Line platform and I can see the train coming into the platform. Timing has been great this morning for trains, because usually I end up waiting for a few minutes.
  • 09:40: I arrive at Angel station and I am thinking that I am probably way ahead of the bus. Unfrotunately there is only one up escalator, so “traffic” is a bit heavy, but I still make it up in the end.
  • 09:43: I walk out of Angel tube station and open up my app to check where the bus is. I look across the road and think “No! This only happens in movies and documentaries.” – I’m assuming this will be a different bus, but I check the registration number and it is – the bus beat me to Angel station!

The benefits of the bus far outweigh taking the tube every day. Firstly, I’ve just proved that it’s faster for me to get across central London by bus (obviously, there are many tube routes which are faster – possibly if I tried doing the same starting from Vauxhall, results would be different), I have mobile signal when I’m on the bus – the wifi access on the tube works, but only in stations and I couldn’t pick up any signal at Moorgate station. And then there’s all the stairs and walking, which might be good for some trying to stay healthy, but I really hate getting to work all sweaty and red in the face. And the bus has a view of London! That’s probably the best reason to take the bus.

The above experiment was done using bus times from the London Bus Pal application for Android. You can download it from the Google Play store here: https://play.google.com/store/apps/details?id=com.mulder.buspal

Take the bus!

Categories
London Bus Pal

London Bus Pal launched – the ideas

Image

My first Android application was launched on 6 September 2013.  It’s called London Bus Pal.

I’ve had the idea for quite some time, but just never got around to doing it.  Finally, over the summer, I sat down and gave it a go.

The idea was for a bus time predication application which you could just open and it would know what you were looking for without complicated set ups.  It should just load it up and it show you what’s nearby.

I went off and built much of the application which can be seen today.  You could see all stops near you and then drill through items to see specific buses, stops and even routes (the route functionality only came later).

One issue I had, which took a while to sort out, was that the way in which I calculated distance, did not take into account roads, so in my case at home, my nearest bus stop, wasn’t the quickest one to walk to.  So I decided to calculate the walking route for each stop near me and then show the closest ones to me in that way.  Unfortunately, this ended up being a really slow process and I actually had to remove this feature.  It was definitely going to add to the cool factor for this application, but sometimes you just have to make a call and say, it’s not worth it!

So what did we end up with:

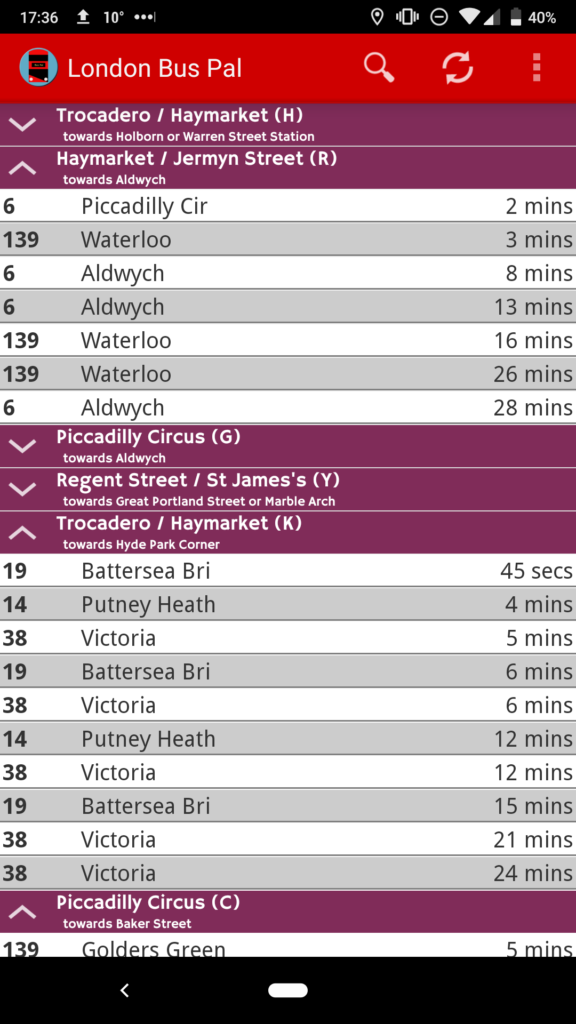
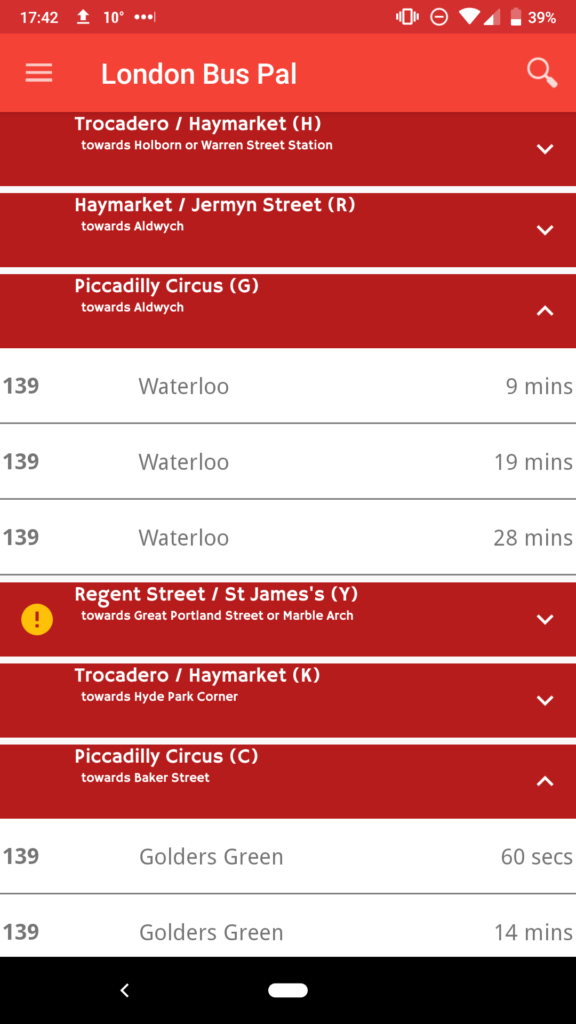
  • Stops near me – when you open the application or tap on the home button, the application tries to find your location and shows you all the bus stops in the area with all of their arrival times in the next 30 minutes.  (This does not work if your location could not be determined – there are many reasons for this).  You can expand and collapse all the stops and if you tap on a bus, you get taken to the bus view (see below).
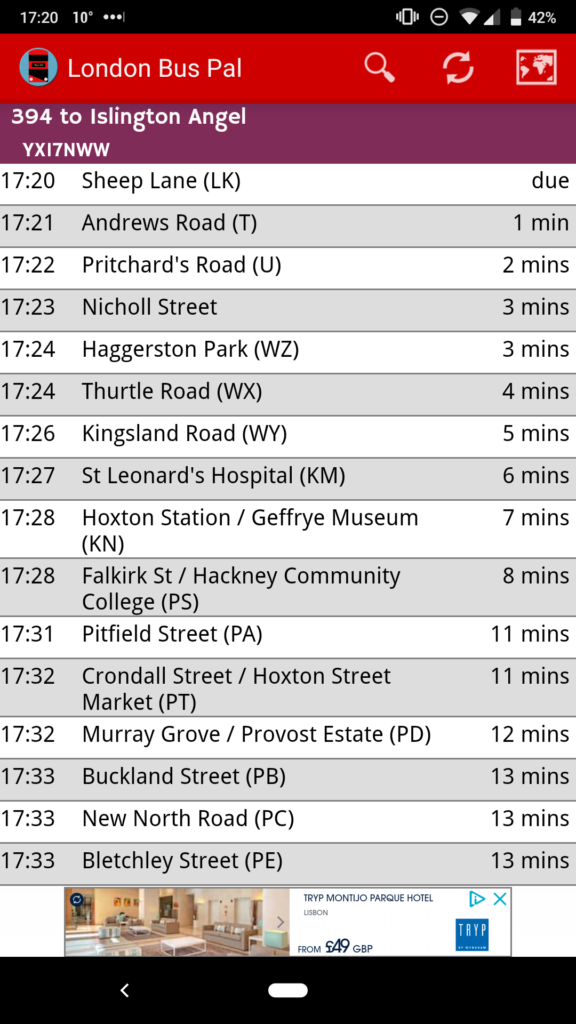
  • Specific bus view – when you tap on a bus in the stops near me or bus stop view, you get taken to the specific bus view which will show you the route details and bus registration number at the top.  You then get a view of the expected time of arrival at all the stops for the next 30 minutes.  This is a useful view for me to keep open and refresh from time to time once I am on the bus, just to check progress.  (A slightly hidden feature is when you see a bit of a thicker line between two stops – this means that the bus changed direction between these stops and it will be heading back to where it came from).
  • Bus stop view – this is similar to the stops near me view, except you only see a single bus stop.  It simply shows you the next buses for any stops for the next 30 minutes.
  • Bus route view – this is a fairly unique view which I haven’t seen available on many other applications.  First, to access it, tap on the bus route details on the top of the specific bus view or enter a route number in search.  This gives you an overview of all the stops on the route, in route order and it shows you when the next bus is due at each of the stops.  It’s quick to see if there is a gap in the service anywhere between stops using this view!
  • Search functionality – this acts as a “short-cut” to many of the views mentioned above.  By entering a post code, or GPS co-ordinates, you will get the stops near me view (but for the entered location), enter a bus stop number (which you can see on the side of the bus stop) for the bus stop view of that bus, enter a bus route number for the bus route view and enter the bus registration number to find a specific bus (I have to point out that this does not work on customised number plates and I believe that some of the New Buses for London have custom number plates).

I decided to stick with this core feature set for now and get the application out there.  There are still many features which I think would make the application truly great, but these will have to wait a while as I only have ten fingers to type with!  As it stands, the feature set is very usable and I use this application constantly and very seldom use any of my competitor applications.

Some of the features I will be working on in the coming weeks and months include (if you are reading this in the future, be sure to check out the latest feature set of the application as this would hopefully not always be work in progress):

  • Bus stop notifications – sometimes TfL puts out alerts or notifications for specific bus stops or routes.  London Bus Pal doesn’t currently display these, so it’s difficult to know if there are any issues affecting your local stop.
  • Map view – being able to see bus stops on a map, especially for the stops near me feature would really add great value to the application.  Sometimes I am also on a bus and I wonder if I could get off early or I am just on a strange route and I want to see which stop I should use.  Being able to see that on a map would be a lifesaver!
  • Strip-maps (maybe) – this would just be a cool feature to have – to see buses on a strip map.  I’ve got some really cool ideas for this.
  • Bookmarks or favourites – most applications have this and they tend to be useful.  We all have our favourite stops and it’s always great to have these ready.  Hopefully the “stops near me” facility partly fulfils the requirement for this feature until it is actually implemented.

If you came across this blog and don’t know what I am talking about, you live in London (or sometimes travel to London) and you have an Android phone, then why not download London Bus Pal: https://play.google.com/store/apps/details?id=com.mulder.buspal.

Looking forward to loads of downloads 🙂